 Pin
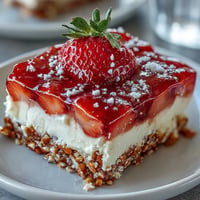
Pin My neighbor brought over a plate of these squares last spring, and I stood at the counter eating three before I even asked what was in them. The color alone made me smile, this unapologetic bubblegum pink that somehow tasted grown up and fruity without being candy-sweet. She laughed when I admitted I thought they'd be complicated, then scribbled the ingredient list on the back of a grocery receipt. I made my first batch that weekend and haven't stopped since.
I brought a tin to my daughter's school bake sale, and they sold out in the first fifteen minutes. One mom texted me that night asking if I'd consider making them for her book club, and suddenly I had a little side hustle going. It wasn't about the money, it was the way people's faces lit up when they bit into that soft, tangy layer. Even the pickiest kids who usually avoid anything pink loved them, and that felt like a small kitchen victory.
Ingredients
- Digestive biscuits or graham crackers: The buttery crunch of digestive biscuits gives a slightly malty base, but graham crackers work beautifully if that's what you have on hand.
- Unsalted butter: Melted butter binds the crumbs into a firm crust that won't crumble when you slice, and using unsalted lets you control the overall sweetness.
- White chocolate chips: Choose a quality brand that lists cocoa butter first, cheaper chips can seize or turn grainy when melted with condensed milk.
- Sweetened condensed milk: This is the magic that turns chocolate into fudge, providing sweetness and that signature creamy set without any thermometer fussing.
- Freeze-dried strawberries: Grinding them into powder concentrates the flavor without adding moisture that would make the fudge too soft, and the color is naturally vibrant.
- Pure vanilla extract: Just a teaspoon rounds out the sweetness and makes the strawberry taste more like real fruit than candy.
- Pinch of salt: A tiny bit of salt balances the sugar and makes the strawberry flavor pop in a way that feels more interesting.
- Pink or red gel food coloring: Completely optional, but one drop deepens the pink into something that photographs like a dream and makes people curious.
Tired of Takeout? 🥡
Get 10 meals you can make faster than delivery arrives. Seriously.
One email. No spam. Unsubscribe anytime.
Instructions
- Prep the pan:
- Line your square pan with parchment, letting the edges hang over like little handles. This trick makes lifting out the fudge so much easier, and you won't risk scratching your pan with a knife.
- Build the crust:
- Toss crushed biscuits with melted butter until every crumb is coated and the mixture clumps when you squeeze it. Press it firmly into the pan using the back of a spoon or the bottom of a glass so it holds together and doesn't crumble later.
- Chill the base:
- Pop the crust in the fridge for ten minutes while you make the fudge layer. A cold base helps the fudge set faster and keeps the layers distinct instead of mushy.
- Melt the fudge:
- Set a heatproof bowl over simmering water and stir white chocolate and condensed milk gently until smooth. Don't let the water touch the bowl or boil hard, or the chocolate might seize into a grainy mess.
- Flavor and color:
- Stir in strawberry powder, vanilla, salt, and a drop of gel color if you want that Instagram-worthy pink. Mix until the color is even and the powder has dissolved completely with no streaks.
- Assemble:
- Pour the warm fudge over the chilled crust and spread it to the corners with a spatula. Tap the pan gently on the counter to release any air bubbles hiding underneath.
- Set in the fridge:
- Cover loosely with plastic wrap and refrigerate for at least two to three hours until the fudge feels firm when you press it lightly. Patience here makes all the difference in clean slicing.
- Slice and serve:
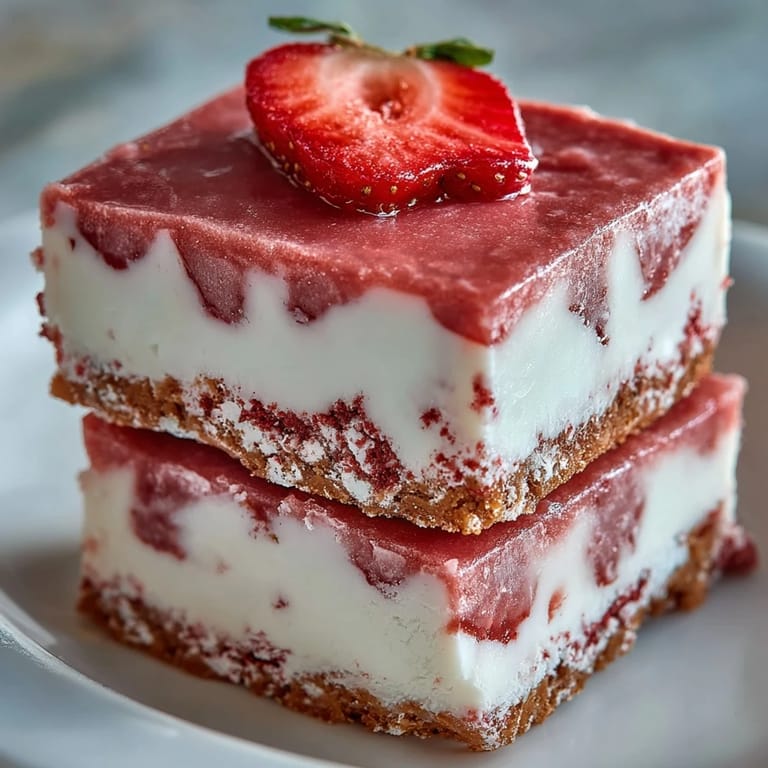
- Lift the whole slab out using the parchment, then cut into sixteen squares with a sharp knife, wiping it clean between cuts. Garnish with fresh strawberry slices or a sprinkle of freeze-dried pieces if you're feeling fancy.
 Pin
Pin One evening I made these for a friend going through a rough patch, and she cried when she opened the tin, not because they were fancy, but because they were pink and cheerful and tasted like someone cared. We sat on her porch eating them straight from the container, and she said it was the first time she'd smiled all week. That's when I realized dessert isn't always about the recipe, sometimes it's just about showing up with something sweet.
How to Store and Serve
Keep these squares in an airtight container in the fridge for up to five days, though they rarely last that long in my house. They're best served chilled or slightly softened at room temperature, which brings out the creaminess and makes the strawberry flavor bloom. If you're packing them for a party, layer parchment between the squares so they don't stick together, and tuck a few ice packs in the bag if it's warm outside.
Customizing Your Fudge
I've swirled in crushed freeze-dried raspberries for a marbled berry look, and I've also folded in mini white chocolate chips for extra texture. One time I added a tablespoon of lemon zest to the fudge and it tasted like strawberry lemonade in solid form, which was a happy accident. You can also swap the digestive biscuits for vanilla wafer crumbs or even crushed pretzels if you want a salty-sweet contrast that keeps people guessing.
Make It Your Own
If you need a dairy-free version, use coconut condensed milk and dairy-free white chocolate, and the texture stays just as fudgy. I've also made these with almond extract instead of vanilla for a subtle marzipan note that pairs beautifully with strawberry. The recipe is forgiving, so don't be afraid to adjust the strawberry powder to taste, start with less if you're nervous and add more next time if you want it bolder.
- Let the fudge sit at room temperature for ten minutes before serving so it slices cleanly and tastes creamier.
- Wipe your knife with a damp cloth between cuts to keep the edges sharp and the squares looking bakery-neat.
- Freeze individual squares wrapped in parchment for up to a month, then thaw in the fridge overnight for an instant treat.
 Pin
Pin These squares have become my go-to whenever I need to bring joy in edible form, and I love that they look impressive but come together in less time than it takes to preheat an oven. Make them once, and I promise you'll find excuses to make them again.
Recipe Q&A
- → Can I use fresh strawberries instead of freeze-dried powder?
Yes, you can substitute 100g of fresh strawberries that have been puréed and strained to remove excess liquid. However, freeze-dried powder provides more concentrated flavor without altering the fudge texture.
- → How long do these fudge squares need to chill before serving?
The fudge requires at least 2-3 hours in the refrigerator to firm completely. For best results, allow the full chilling time to ensure clean cutting and proper texture.
- → Can I make these dairy-free?
Absolutely. Substitute dairy-free white chocolate chips and coconut condensed milk for the traditional versions. The texture and setting time remain similar with these alternatives.
- → What's the best way to get clean cuts when slicing?
Use a sharp knife and wipe the blade clean between each cut. For even cleaner slices, you can warm the knife under hot water and dry it before cutting through the chilled fudge.
- → How should I store these strawberry fudge squares?
Keep them in an airtight container in the refrigerator for up to 5 days. Let them sit at room temperature for about 10 minutes before serving if you prefer a softer texture.
- → Can I add other berries to the fudge mixture?
Yes, you can swirl in crushed raspberries for a marbled berry effect, or substitute raspberry powder for some of the strawberry powder to create mixed berry flavors.