 Pin
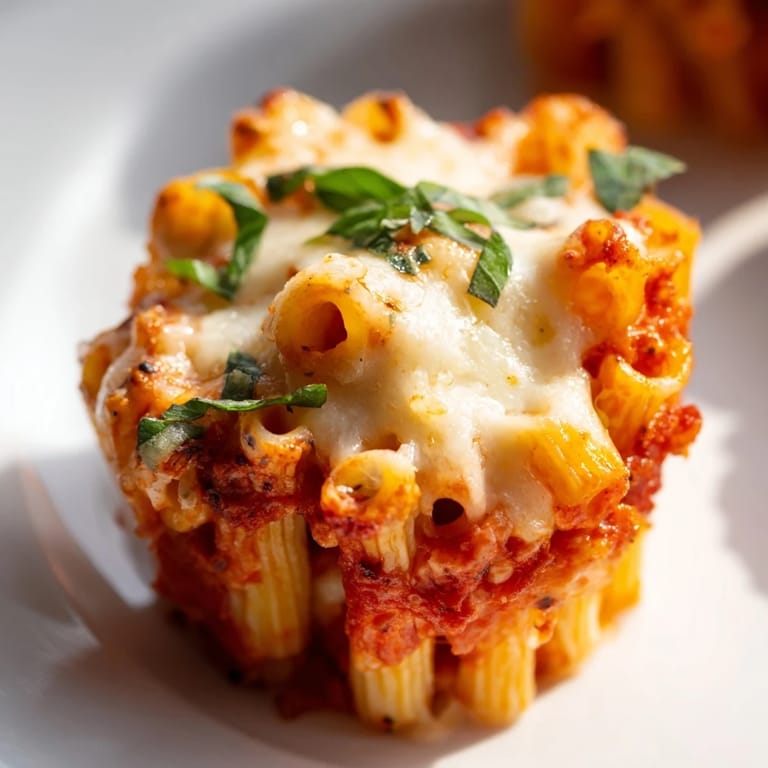
Pin I discovered these baked ziti cups by accident on a Tuesday afternoon when my muffin tin caught my eye while searching for a baking dish. Something clicked—what if I treated pasta like a handheld treasure, something you could grab warm from the oven without a plate? The first batch came out crispy on top and creamy inside, and I realized I'd stumbled onto the perfect solution for the constant question of what to cook when everyone's hungry at different times.
I brought these to my sister's potluck last spring, and she texted me three times asking for the recipe before I'd even left her driveway. People kept coming back for seconds, turning them over in their hands like they were solving a puzzle. That's when I knew I'd created something special—food that felt both elegant and completely unpretentious.
Ingredients
- 225 g ziti or rigatoni pasta: Don't skip the al dente part—these shapes hold the sauce better than delicate pasta, and staying slightly firm keeps them from turning mushy in the oven.
- 1 tablespoon olive oil: Use something you actually enjoy tasting, not the budget stuff—it flavors the whole sauce base.
- 2 cloves garlic, minced: Fresh is non-negotiable here; it wakes up the canned tomatoes and makes them taste homemade.
- 400 g canned crushed tomatoes: San Marzano if your budget allows, but any quality crushed tomatoes work beautifully.
- 1 teaspoon dried Italian herbs: Or mix your own with dried basil, oregano, and thyme—it gives you more control over the flavor.
- Salt and black pepper to taste: Season as you go, not just at the end.
- 250 g ricotta cheese: The creamy secret layer that makes these rich and luxurious.
- 60 g grated Parmesan cheese: Fresh grated tastes nothing like the shaker kind—it's worth the thirty seconds of effort.
- 1 large egg: This binds everything together and keeps the ricotta mixture from being runny.
- 2 tablespoons chopped fresh basil: Optional but highly recommended if you can find it—it brightens everything.
- 150 g shredded mozzarella cheese: Use whole milk mozzarella if you can; it melts better and tastes richer than low-fat versions.
Tired of Takeout? 🥡
Get 10 meals you can make faster than delivery arrives. Seriously.
One email. No spam. Unsubscribe anytime.
Instructions
- Get your oven and tin ready:
- Preheat your oven to 190°C and give your muffin tin a light spray of nonstick cooking spray—the nonstick matters more here than you'd think. These cups need to slide out cleanly, so don't skip this step.
- Cook the pasta:
- Boil your ziti in salted water until just al dente, then drain and spread it on a plate to cool. Slightly cooled pasta is easier to work with and won't break apart when you're layering.
- Make your tomato sauce:
- Heat olive oil in a saucepan, add minced garlic, and let it fragrant for about a minute—you'll know when it smells right. Stir in your crushed tomatoes, herbs, salt, and pepper, then simmer for 5 minutes to let the flavors marry.
- Mix the ricotta filling:
- In a bowl, combine ricotta, Parmesan, egg, and salt until smooth. The egg is what holds this together, so make sure it's fully incorporated.
- Combine pasta with sauce:
- In a large bowl, toss your cooled pasta with half the tomato sauce and half the mozzarella—this is your base layer. The sauce coats everything evenly, and the cheese helps it all stick together.
- Build your cups:
- Divide half the pasta mixture into your muffin cups, pressing gently. Spoon a bit of ricotta mixture into each, then top with remaining pasta, more sauce, and the rest of the mozzarella—like you're building tiny lasagnas standing up.
- Bake and cool:
- Bake for 20-25 minutes until the cheese is melted and bubbly, then let them rest for 5 minutes in the tin. This resting time is crucial—it lets everything set just enough so they hold their shape when you lift them out.
 Pin
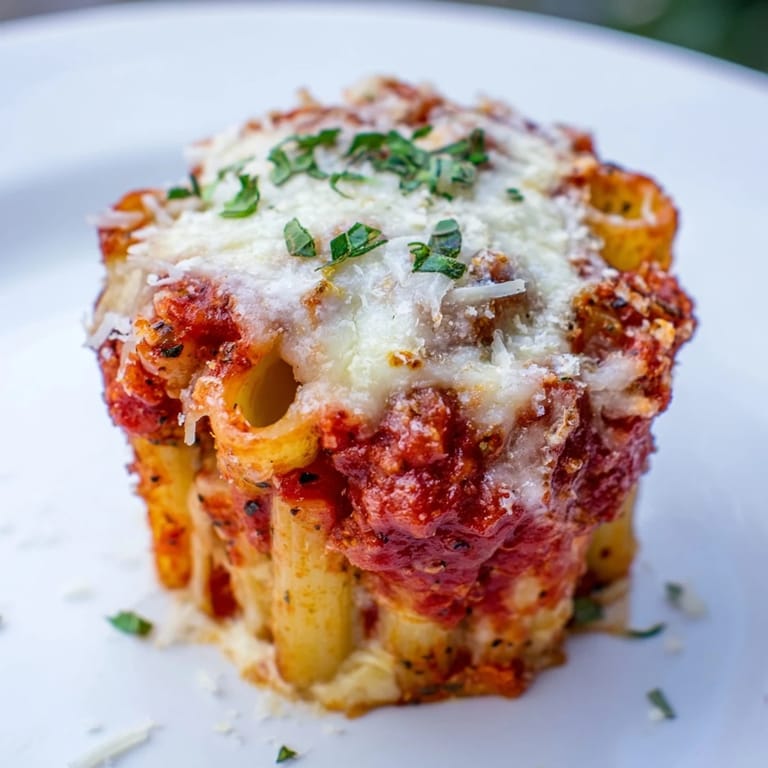
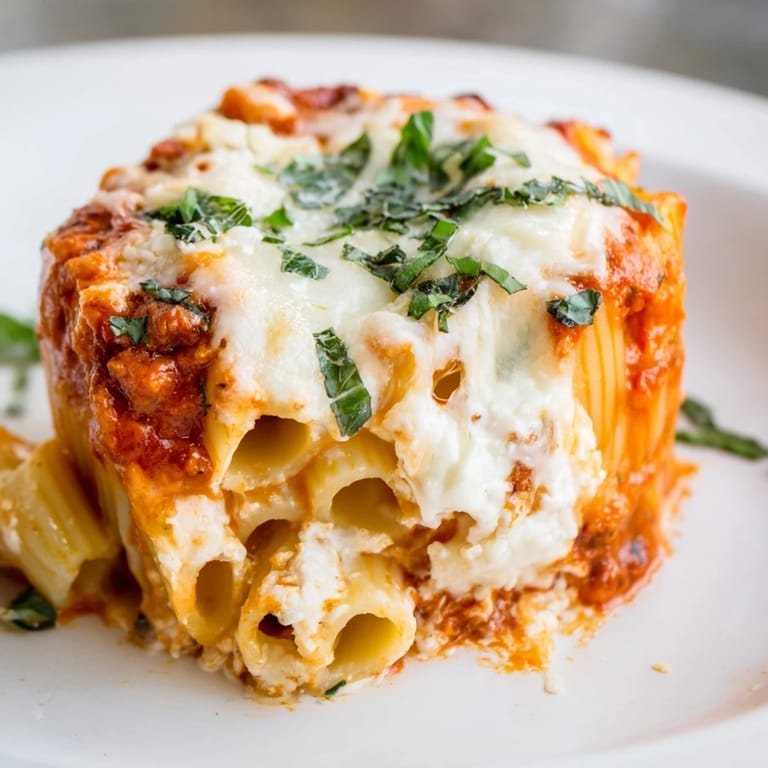
Pin There's something deeply satisfying about watching someone pick up one of these cups, bite into the crispy cheese on top, then discover the tender pasta and creamy ricotta inside. It's a three-texture experience in one hand, and that moment of realization on their face never gets old.
Why Individual Portions Change Everything
Before these cups, baked ziti meant one big dish and endless conversations about serving sizes. These cups solve that completely—everyone gets their own perfect portion, and somehow food feels more special when it arrives as its own little package. Kids love them because they can hold one in their hand, grown-ups appreciate them because there's no scooping, and busy people love them because they freeze individually and reheat in minutes.
Making Them Your Own
The beauty of this recipe is how flexible it is without losing its soul. I've added sautéed spinach to the ricotta mixture, scattered roasted red peppers between the layers, and even browned Italian sausage into the sauce on nights when I wanted something heartier. One of my friends adds a pinch of red pepper flakes to her sauce because she loves heat, and another uses all ricotta instead of the ricotta-mozzarella combo because she prefers a creamier inside.
Storage, Freezing, and Reheating
Make these on a Sunday and you'll have lunch solved for most of the week—they keep in the fridge for three days and freeze beautifully for up to a month. Reheat from frozen in a 180°C oven for about 15 minutes, or microwave individual cups for 90 seconds, though the oven method keeps the tops crisper. There's something wonderful about pulling these from the freezer on a hectic evening and transforming them into actual dinner with almost zero effort.
- Wrap cooled cups individually in plastic wrap or foil before freezing to prevent them from drying out.
- Label your container with the date so you remember when you made them.
- These travel well in lunchboxes too—they're still delicious at room temperature, though warm is always better.
 Pin
Pin These cups have become my answer to so many cooking dilemmas—party food, meal prep, something special for my kid's lunchbox, even an emergency dinner when someone unexpected shows up. They're humble enough to feel homemade, but impressive enough that people always ask for the recipe.
Recipe Q&A
- → What type of pasta works best for the cups?
Ziti or rigatoni are ideal due to their tubular shape, but penne can be used as a substitute.
- → Can these cups be prepared ahead of time?
Yes, they can be assembled in advance and refrigerated before baking to save time.
- → How do I ensure the cups hold their shape?
Press the layered pasta and cheese mixtures firmly in the muffin tin and allow them to cool slightly after baking for easier removal.
- → Are these cups freezer-friendly?
Absolutely, they freeze well and can be reheated in the microwave or oven without losing texture.
- → What can I add for a meaty variation?
Cooked Italian sausage or ground beef mixed into the tomato sauce enhances the flavor and makes it heartier.