 Pin
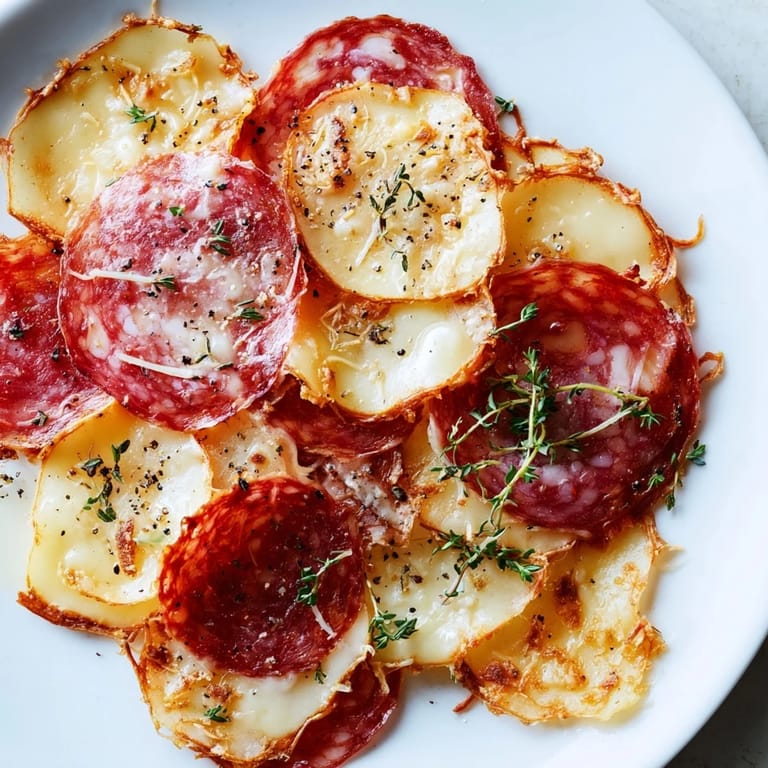
Pin I discovered charcuterie chips by accident one evening when I was arranging a board for friends and realized I had way too many thin slices of prosciutto and aged cheddar left over. Instead of tossing them, I thought: what if I just baked these? Twenty minutes later, I pulled out something impossibly crispy and golden that tasted like a concentrated, elegant version of everything I loved about a proper charcuterie plate. Everyone devoured them before the actual appetizers arrived.
My neighbor tasted these at a casual dinner and asked if I'd made them at a restaurant. That moment—when she realized they came from my oven in less than half an hour—made me understand why this recipe never leaves my rotation. It's the kind of thing that makes you look thoughtful and prepared without requiring any real skill.
Ingredients
- Thinly sliced salami (100 g): Look for the thinnest slices your market offers—they'll crisp up into paper-thin shards. Thicker cuts won't achieve that satisfying crunch.
- Thinly sliced prosciutto (100 g): This is where delicate flavor comes in; the salt and cure intensify as it bakes. Don't skip it thinking all cured meats are interchangeable.
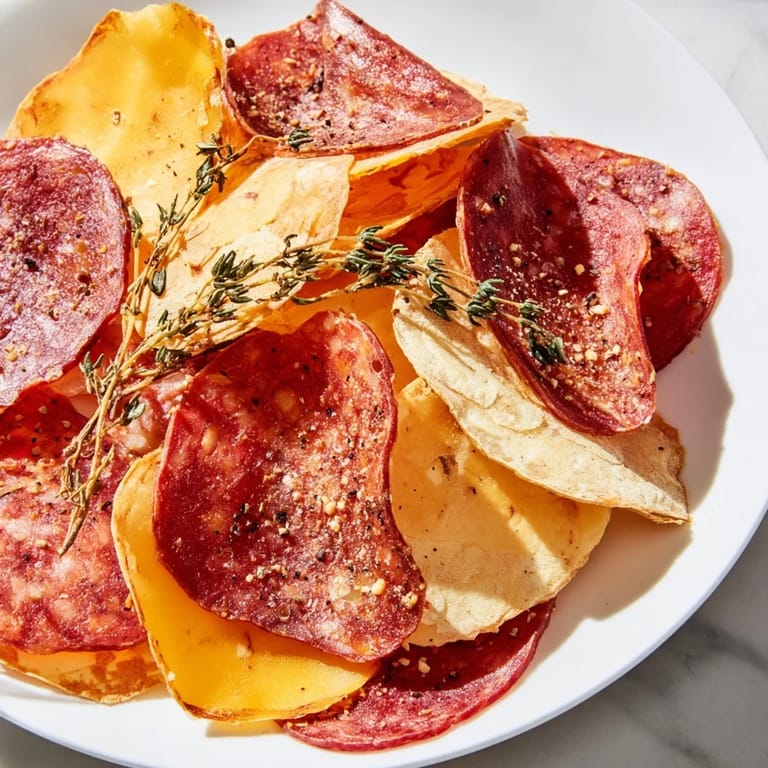
- Thinly sliced pepperoni (100 g): The slight spice rounds out the flavor profile and adds visual color to your spread.
- Aged hard cheese like cheddar, Manchego, or Parmesan (100 g): These don't have much moisture, so they'll crisp up rather than melt into puddles—crucial for the right texture.
- Semi-hard cheese like Gouda or provolone (100 g): These melt slightly and bubble beautifully, creating a different but equally craveable chip texture.
- Fresh herbs like thyme or rosemary (optional): A small handful chopped fine adds sophistication; rosemary especially transforms these into something restaurant-worthy.
- Cracked black pepper (optional): A generous crack over the cheese before baking elevates the whole thing.
Tired of Takeout? 🥡
Get 10 meals you can make faster than delivery arrives. Seriously.
One email. No spam. Unsubscribe anytime.
Instructions
- Heat your oven and prep the stage:
- Set the oven to 375°F and line two large baking sheets with parchment paper. You need two sheets because meat and cheese bake at different speeds, and this prevents any steam from making things soggy.
- Arrange the meat in a single layer:
- Lay out your salami, prosciutto, and pepperoni without overlapping—each slice needs air around it to crisp properly. It looks sparse, but that's exactly right.
- Space out the cheese slices:
- Do the same with your cheese on the second sheet, leaving room between each slice so they can bubble and brown without fusing together. This spacing matters more than you'd think.
- Season the cheese if you like:
- Sprinkle herbs and pepper over the cheese slices now—they'll toast slightly as things bake and release their aromatics right into the cheese.
- Bake the meat until crispy:
- Slide the meat sheet into the oven for 8–10 minutes. You're watching for the edges to turn golden and crisp; they'll smell irresistible when they're close. Remove and let cool completely on the sheet—this is when they'll harden into proper chips.
- Bake the cheese until bubbly and golden:
- The cheese goes in for 6–8 minutes; you want it golden and bubbling at the edges but not burnt. Give it 5 minutes to cool slightly, then gently lift each piece off the parchment with a metal spatula—they'll come free easily once cooled.
- Arrange and serve:
- Layer your cooled meat and cheese chips on a platter and serve immediately while they're still crispy. They soften quickly once made, so timing matters.
 Pin
Pin I made these for a wine tasting once and someone asked why I wasn't selling them. It was a throwaway comment, but it stuck with me—not because I'd ever start a business, but because it reminded me that the simplest ideas are often the ones people remember most. Sometimes the best food moments come from happy accidents and leftover bits.
Choosing Your Meats and Cheeses
The magic here is in the contrast. Seek out cured meats that are genuinely thin—almost translucent—because they'll turn into crispy, lacy chips rather than shriveled leather. For cheese, the rule is simple: harder cheeses crisp, softer ones melt. Mixing both means you get two different textures on one platter, which keeps things interesting. I once made these with only Parmesan and they were delicious but one-note; adding Gouda made all the difference.
Flavor Variations That Work
These chips are blank canvas enough that you can play around. Smoked paprika sprinkled on the cheese before baking adds warmth and depth. I've also tried a tiny brush of Dijon mustard on the meat chips before baking—it caramelizes and adds this subtle tang that people can't quite identify but absolutely love. Fresh thyme or rosemary charred lightly in the oven becomes almost smoky and sophisticated.
Storage and Make-Ahead Options
These are best enjoyed fresh, but they'll keep in an airtight container at room temperature for up to two days—they'll soften slightly but remain edible. If you want to get ahead, you can arrange everything on your baking sheets a few hours in advance, cover loosely with plastic wrap, and bake when guests arrive.
- Make sure your containers are truly airtight or they'll absorb moisture from the air and lose their crunch.
- If they do soften, a quick 3-minute reheat in a 350°F oven brings back some of the crispiness.
- Pair them with something acidic like pickles or olives to balance the richness of the meat and cheese.
 Pin
Pin What started as a way to use up odds and ends has become my go-to when I want to impress without fussing. These little chips remind me that some of the best discoveries happen when you're not trying too hard.
Recipe Q&A
- → What types of meats work best for charcuterie chips?
Thinly sliced cured meats like salami, prosciutto, and pepperoni crisp up well and provide rich, savory flavors.
- → Which cheeses are ideal for baking crispy chips?
Hard and semi-hard cheeses such as aged cheddar, Manchego, Parmesan, Gouda, and provolone become golden and crunchy with baking.
- → Can herbs be added before baking?
Yes, finely chopped fresh herbs like thyme or rosemary sprinkled on cheese slices add aroma and depth without overpowering the flavor.
- → How do I store leftover chips?
Keep cooled chips in an airtight container at room temperature for up to 2 days to maintain crispness.
- → Are these chips suitable for low-carb diets?
Absolutely, using cured meats and cheeses makes these chips a flavorful low-carb snack option.