 Pin
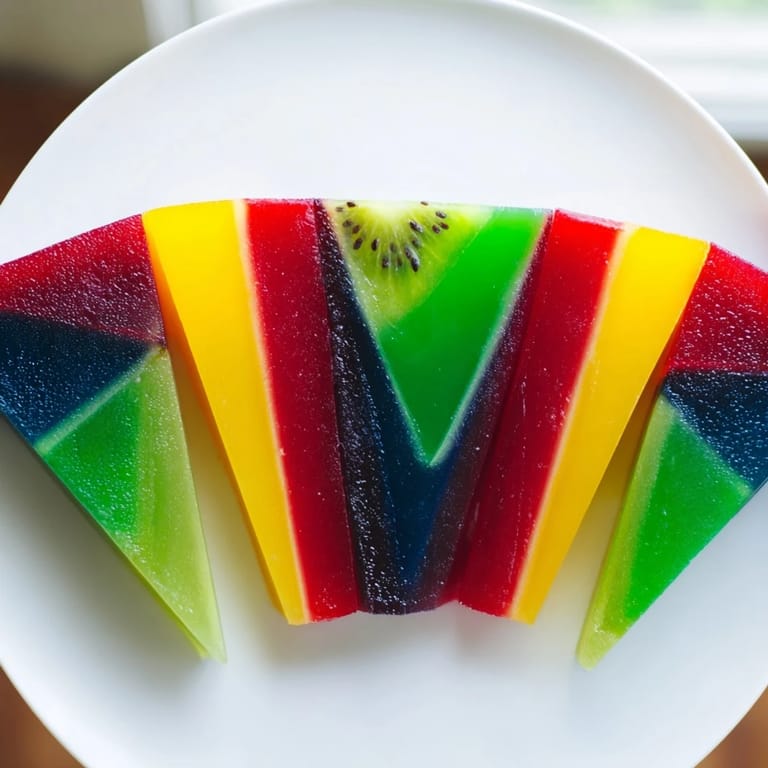
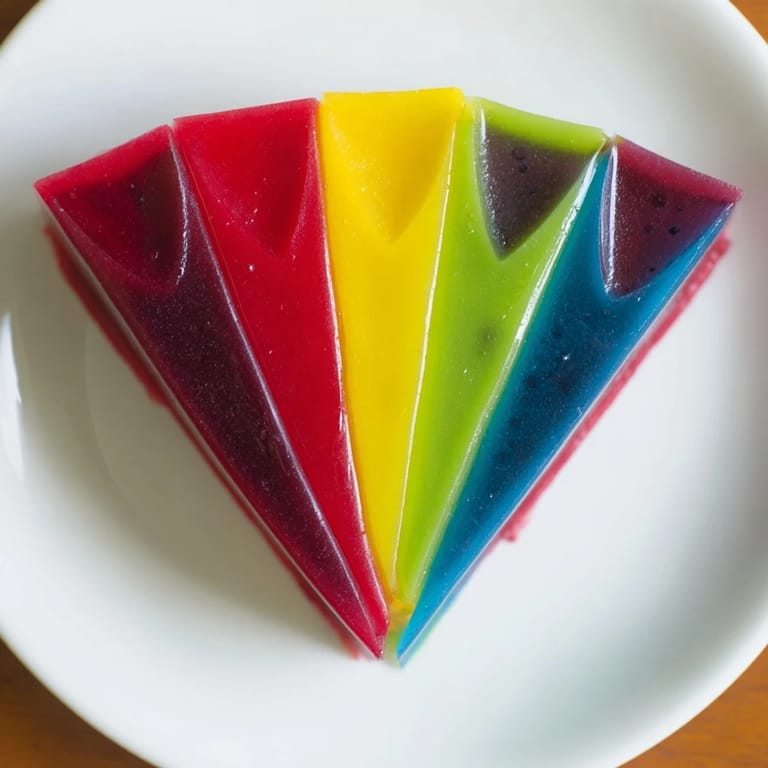
Pin The first time I made The Kaleidoscope, I was trying to impress someone at a dinner party, and honestly, I was nervous about the whole V-shaped segment concept. But standing in my kitchen with five small bowls of jewel-toned custard in front of me, I felt like a stained glass artist rather than a baker. When I finally unmolded it and cut into those wedges, watching the colors fan out in perfect geometric harmony, I realized this wasn't just dessert—it was edible art that actually tasted incredible.
I made this for my sister's birthday last spring, and she actually gasped when I brought it to the table. She had no idea something this visually complex could come from our tiny kitchen, and neither did I, really. That moment of her carefully photographing each slice before eating it reminded me why I love cooking things that feel a little bit magical.
Ingredients
- Whole milk and heavy cream: The combination creates a silky custard base that holds color beautifully without tasting heavy or overly sweet.
- Granulated sugar: Dissolves completely when heated, ensuring a smooth texture rather than any grittiness.
- Powdered or sheet gelatin: Sheet gelatin gives slightly more reliable results, but powdered works just fine if that's what you have.
- Vanilla extract: A small amount lifts all five flavors without making them taste homogeneous.
- Food coloring and fruit purees: Gel coloring tends to be more vibrant than liquid, and using fruit purees adds flavor rather than just relying on color alone.
- Digestive biscuits or graham crackers: A simple, sturdy base that won't get soggy even after three hours of chilling.
- Unsalted butter: Binds everything together and adds richness without competing with the delicate custard layers above.
Tired of Takeout? 🥡
Get 10 meals you can make faster than delivery arrives. Seriously.
One email. No spam. Unsubscribe anytime.
Instructions
- Make and chill the base:
- Crush your biscuits until they feel like wet sand, mix them thoroughly with melted butter, then press them firmly into the bottom of your prepared pan. It's tempting to skip the chilling step, but those 40 minutes give the base time to firm up so it won't crack when you pour the custard on top.
- Prepare the gelatin:
- Sprinkle the gelatin over cold water and let it sit untouched for five minutes—this blooming step is crucial because it helps the gelatin dissolve evenly into your custard without creating lumps. If you're using sheets, you'll squeeze out water gently with your fingertips to avoid overdoing it.
- Heat the custard base:
- Watch the milk and cream mixture carefully as it heats; you want it steaming hot but not boiling, which can damage the gelatin's setting power. Once it's ready, stir in the bloomed gelatin slowly, making sure every granule disappears completely into that smooth, glossy custard.
- Divide and color:
- Pour the warm custard into five bowls and add your fruit puree and a tiny bit of food coloring to each one, stirring gently but thoroughly so the color is even. You'll notice each mixture looks slightly different as the fruit and color swirl together, and that's exactly what you're after.
- Divide the pan into V-shaped sections:
- This is where it gets fun—use aluminum foil or sturdy cardboard to create five wedge-shaped sections radiating from the center, like you're dividing a pie. Make sure your dividers reach all the way to the edge and are tall enough to prevent the custard from seeping between sections.
- Pour and set the first layers:
- Pour each colored custard into its designated wedge, filling them evenly to about half the height of your pan. After 30 minutes of chilling, the custard will be set enough that you can carefully remove the dividers without everything collapsing.
- Final chill:
- Once the dividers are out, you can either pour additional layers for more height or simply chill the whole thing for at least two more hours until it's completely firm and ready to serve.
 Pin
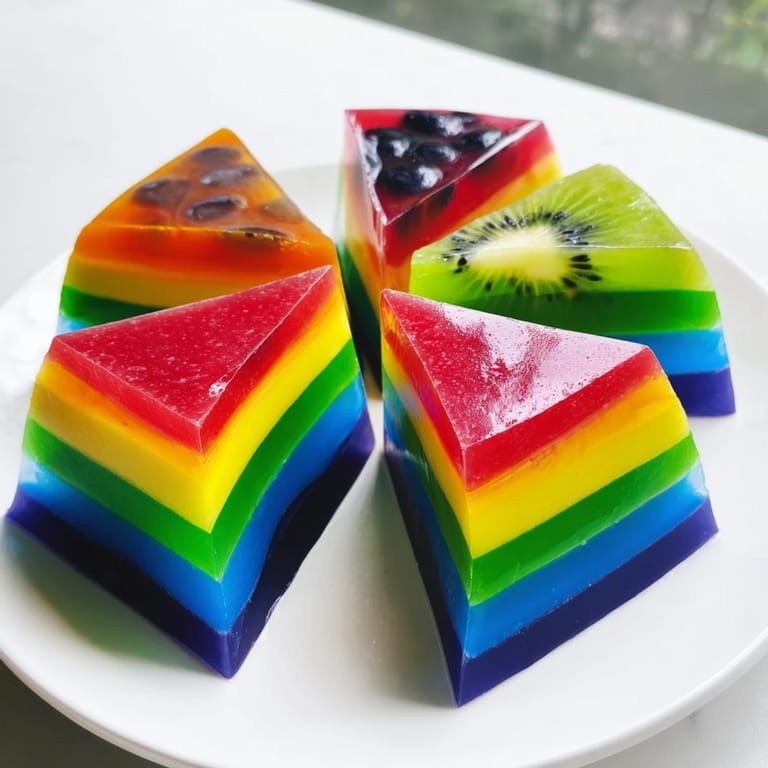
Pin The moment I unmolded this dessert, I understood why people love food presentation so much. It wasn't just about looking beautiful on the plate; it was about the feeling of having created something that seemed impossible, something guests would remember long after the taste faded.
Choosing Your Flavor Combinations
The magic of The Kaleidoscope is that you're not locked into any single flavor story. You could go fruity all the way with raspberry, strawberry, mango, passionfruit, and blackberry, or get creative with citrus layers like lemon, lime, orange, grapefruit, and blood orange. I've also made a chocolate version by substituting one of the fruit purees with melted dark chocolate, which created this stunning dark purple-brown wedge that completely changed the mood of the dessert.
Timing and Temperature Matter
The 30-minute chilling between removing dividers and final serving isn't just about texture—it's about the custard becoming stable enough that you can slice it cleanly without the pieces falling apart. I learned this the hard way by trying to slice it too early, and the result was more of a beautiful custard puddle than elegant wedges. Let the final chill happen in the coldest part of your refrigerator, away from any warm spots near the door.
Plating and Serving Ideas
Serve each wedge on a chilled plate with a small dollop of whipped cream or crème fraîche on the side. Fresh berries or even candied fruit strips can sit alongside the slice, echoing the colors you've already created. I like to add a small mint leaf on top just before serving, which adds a pop of color and a hint of freshness that makes people want to photograph it before they eat it.
- A thin coulis made from one of your fruit purees drizzled around the plate turns it into restaurant-level presentation.
- If someone has a dairy allergy, you can make a completely dairy-free version using coconut milk and agar-agar in place of gelatin.
- Slice with a sharp, thin knife dipped in hot water between each cut for the cleanest, most impressive results.
 Pin
Pin This dessert taught me that sometimes the most impressive things come from embracing simplicity with intention. It's just flavored custard and a clever way to pour it, and that's exactly what makes it so unexpectedly perfect.
Recipe Q&A
- → What creates the V-shaped segments in this dessert?
Aluminum foil or cardboard dividers are used to separate the pan into V-shaped sections, allowing different colored mixtures to set distinctly.
- → Can gelatin be replaced for dietary preferences?
Yes, agar-agar can substitute gelatin for a vegan-friendly version, paired with coconut milk and cream alternatives.
- → How are the different colors achieved?
Food coloring is added to each portion of the base mixture, combined with matching fruit purées to create vibrant, contrasting layers.
- → What is the base layer made of?
The base consists of crushed digestive biscuits or graham crackers mixed with melted butter, pressed firmly to form a sturdy crust.
- → How long does the dessert need to chill before serving?
After layering, the dessert should chill for at least 3 hours total, including 30 minutes for initial setting and an additional 2+ hours once assembled.