 Pin
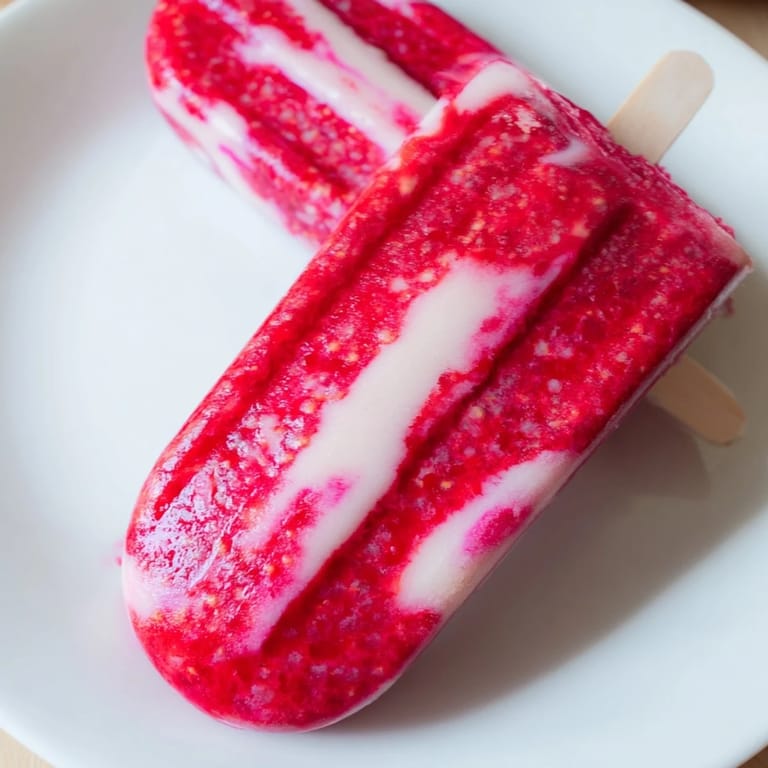
Pin My youngest daughter discovered she could freeze almost anything last summer and spent weeks experimenting with juice boxes and yogurt tubes in the freezer. One afternoon she decided to blend some leftover raspberries with coconut milk from my curry ingredients and the result was unexpectedly perfect. These pops became her signature contribution to every backyard barbecue we hosted.
We served these at a block party in July when the heat index broke 100 degrees and parents were desperate for something cool. I watched three different dads ask for the recipe while their kids demanded seconds. The best part was how quiet the yard got when everyone started eating them.
- Fresh or frozen raspberries: Frozen berries work beautifully here and actually create a slightly thicker puree that layers better
- Full fat coconut milk: The cream that rises to the top of the can is pure gold do not shake the can before opening
- Honey or maple syrup: Coconut milk needs this sweetness to balance its natural savory notes
- Lemon juice: This tiny amount wakes up the entire raspberry flavor
- Vanilla extract: Pure vanilla makes coconut taste like a treat not just an ingredient
- Pinch of salt: The secret to making these taste professional instead of homemade
- Blend the raspberry base:
- Pulse the berries with sweetener and lemon juice until completely smooth then taste and add more sweetener if your raspberries were particularly tart
- Whisk the coconut layer:
- Combine coconut milk with sweetener vanilla and salt until no lumps remain and the mixture feels silky
- Layer the molds:
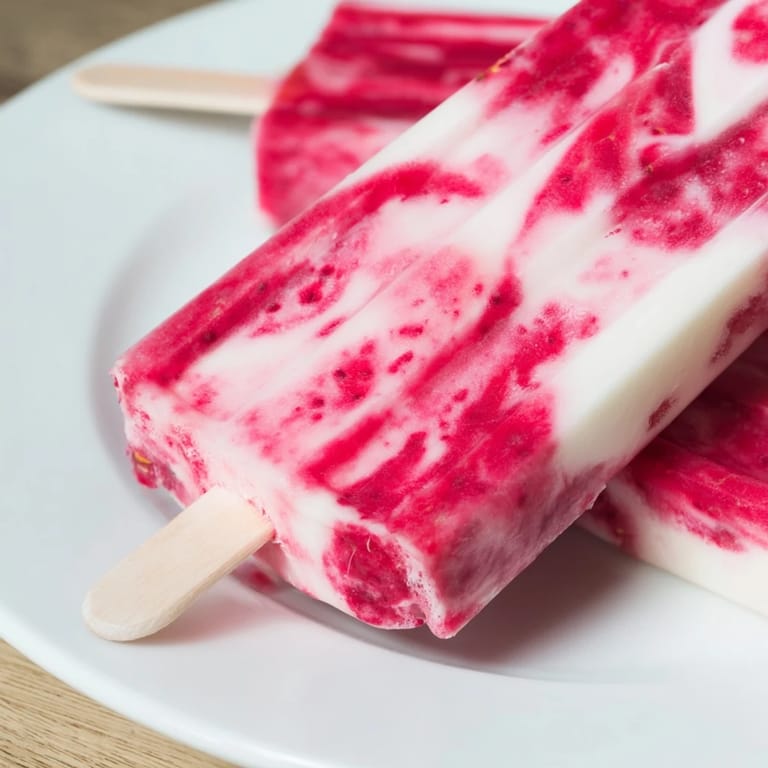
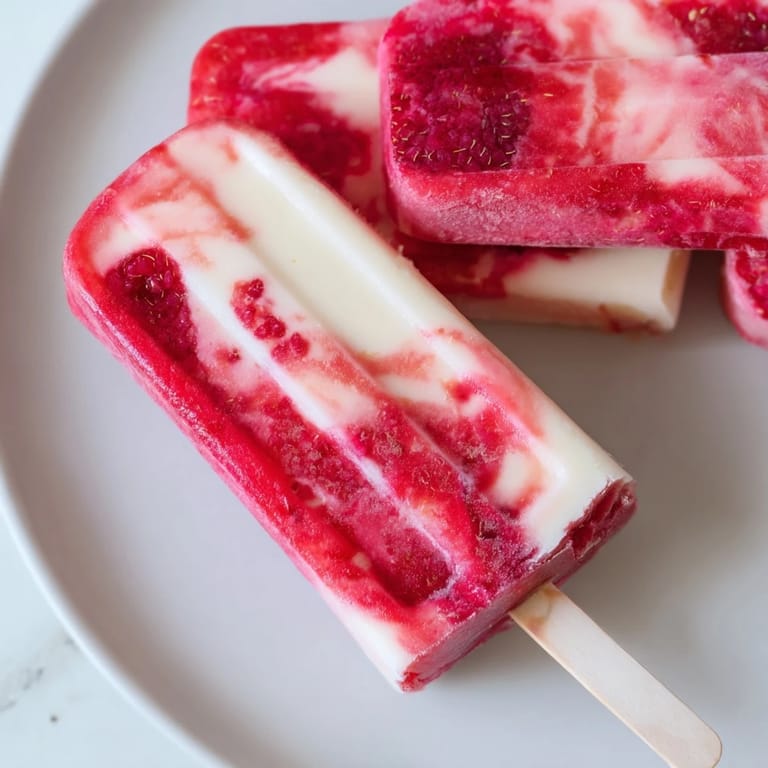
- Spoon raspberry puree into each mold followed by the coconut mixture or gently swirl together for a marbled look
- Freeze completely:
- Insert sticks and freeze for at least four hours though overnight is even better for the firmest texture
- Release the pops:
- Run warm water over the molds for ten seconds then pull gently until the pops slide out
 Pin
Pin Tired of Takeout? 🥡
Get 10 meals you can make faster than delivery arrives. Seriously.
One email. No spam. Unsubscribe anytime.
My neighbor borrowed our molds three times last summer and finally bought her own set after I caught her sneaking through our freezer at 10 PM. Now we both keep batches ready and text each other when the supply runs low.
The beauty of this recipe is how easily it adapts to whatever berries you have on hand or find at the market. I have made successful versions with strawberries blackberries and even peaches when stone fruit was in season.
If you do not have ice pop molds small paper cups work perfectly with wooden sticks inserted after an hour of freezing. Silicone molds release the easiest but plastic ones are fine if you are patient with the warm water trick.
These shine brightest alongside something simple like a bowl of fresh berries or a light cookie. The contrast between frozen creamy and fresh juicy makes everyone feel like you planned a thoughtful dessert course.
- Let them soften two minutes before serving for the best texture
- Store in the molds with a piece of parchment pressed against the surface
- These keep well for two weeks though they never last that long here
 Pin
Pin There is something deeply satisfying about opening the freezer and seeing these lined up ready to go like you have your own personal ice cream shop at home.
Recipe Q&A
- → How can I make the ice pops sweeter naturally?
Use honey or maple syrup to naturally sweeten both raspberry and coconut layers, adjusting to taste before freezing.
- → Can I substitute raspberries with other fruits?
Yes, strawberries or mixed berries can replace raspberries for varied fruity flavors while maintaining texture and color.
- → What causes the marbled effect in the ice pops?
Gently swirling the raspberry puree and coconut mixture inside the molds before freezing creates the appealing marbled look.
- → How long should the ice pops freeze for optimal texture?
Freeze for at least 4 hours or until completely solid to ensure a firm, smooth consistency that's easy to unmold.
- → Are these ice pops suitable for specific dietary needs?
Yes, they are vegan, gluten-free, and dairy-free, making them suitable for a variety of dietary preferences.