 Pin
Pin My grandmother would stand at her kitchen counter with flour dusting her apron, rolling out thin sheets of dough for pelmeni while telling me stories about winters in Russia. The kitchen would fill with the smell of simmering meat and onions, and I'd watch her deft hands fold each dumpling into that distinctive shape—half-moon, then pinched at the corners to seal. Years later, I found myself doing the exact same thing, muscle memory somehow inherited through her recipes, and realized these tiny dumplings were her way of wrapping up warmth and home in bite-sized packages.
I made these for a dinner party on a snowy evening, and watching my friends' faces light up when they tasted the tender dough and savory filling made me understand why my grandmother had spent so much time perfecting this recipe. There's something about homemade pelmeni that store-bought versions can never capture—the texture, the care, the slight imperfections that prove they were made by hand.
Ingredients
- All-purpose flour (2 cups): This is your foundation, and using fresh flour makes a noticeable difference in how silky your dough becomes.
- Cold water (1/2 cup): The temperature matters—cold water keeps the dough tender and prevents it from becoming tough.
- Large egg (1): This binds everything together and gives the dough structure to hold the filling.
- Salt (1/2 tsp for dough): A simple seasoning that strengthens the gluten network.
- Ground pork and beef (7 oz each): The combination of both meats creates a more complex, satisfying flavor than using just one.
- Small onion, finely grated: Grating instead of mincing releases the onion's moisture, which keeps the filling juicy and prevents it from drying out during cooking.
- Garlic (2 cloves, minced): Fresh garlic adds brightness that balances the richness of the meat.
- Black pepper and salt for filling: Season generously—the filling should taste slightly over-seasoned because it mellows when mixed with the dough.
- Cold water (2 tbsp for filling): This extra moisture is what makes the filling sticky and ensures each pelmeni stays moist inside.
- Sour cream (1 cup): The cooling counterpoint to the warm dumplings, essential for serving.
- Fresh dill (1 tbsp, optional): A bright garnish that brings the whole dish together, though not strictly necessary.
Tired of Takeout? 🥡
Get 10 meals you can make faster than delivery arrives. Seriously.
One email. No spam. Unsubscribe anytime.
Instructions
- Make the dough:
- Combine your flour and salt in a large bowl, then crack in the egg and start mixing with one hand while drizzling in the cold water gradually. Knead for 8 to 10 minutes until the dough transforms from shaggy to smooth and springs back when you poke it. Cover it with plastic wrap and let it rest for 20 minutes on the counter—this resting time is when the gluten relaxes and makes rolling so much easier.
- Prepare the filling:
- Mix the ground pork and beef together in a bowl, then add your grated onion, minced garlic, salt, pepper, and cold water. Stir vigorously until the mixture becomes sticky and well combined, which should take about a minute of enthusiastic mixing. The filling should feel almost paste-like, not crumbly.
- Roll and cut:
- Dust your work surface lightly with flour and roll the dough out to about 2 mm thick—this is thinner than you might expect, but trust it. Using a 2.5-inch round cutter, punch out circles, gathering scraps and re-rolling as you go.
- Fill and fold:
- Place roughly 1 teaspoon of filling in the center of each circle, then fold it in half and pinch the straight edge to seal tightly. Now bring the two corners together and pinch them firmly—this creates that characteristic pelmeni shape and ensures the filling stays locked inside.
- Boil until they float:
- Bring a large pot of salted water to a rolling boil, then drop the pelmeni in batches, stirring gently with a wooden spoon so they don't stick to the bottom. They'll sink at first, then float to the surface after about 3 minutes—once they float, give them another 2 to 3 minutes for the filling to cook through.
- Serve and enjoy:
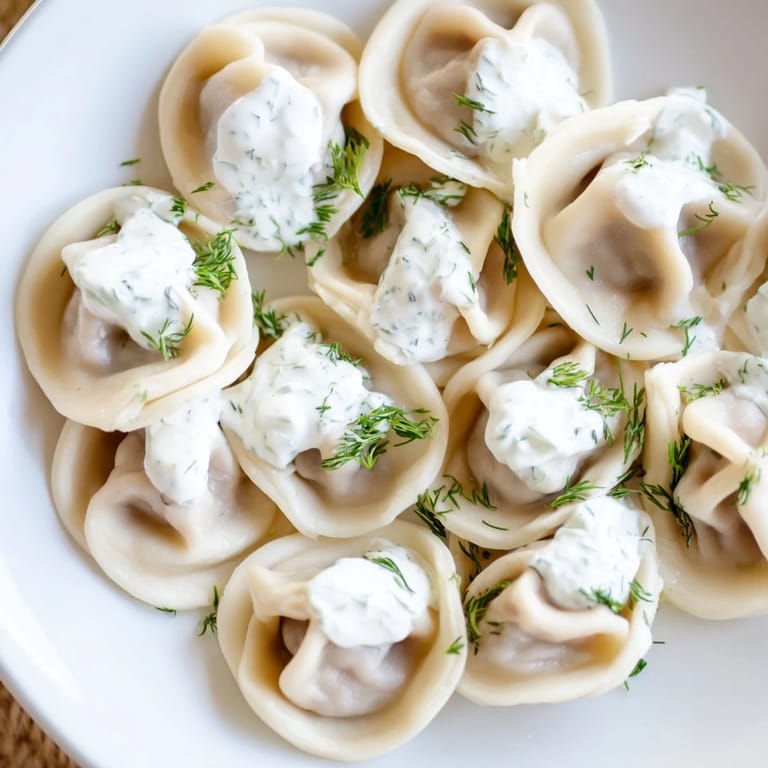
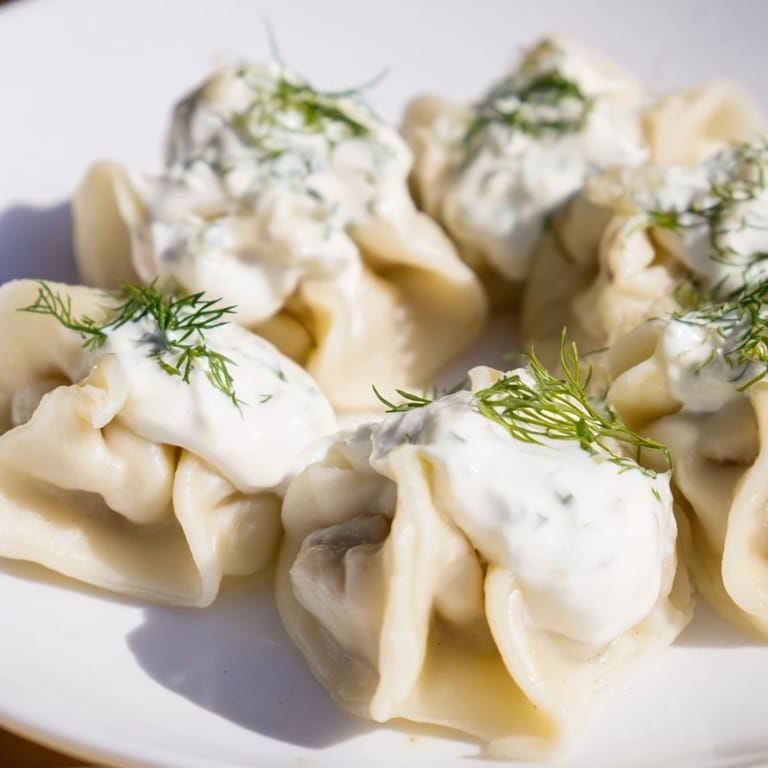
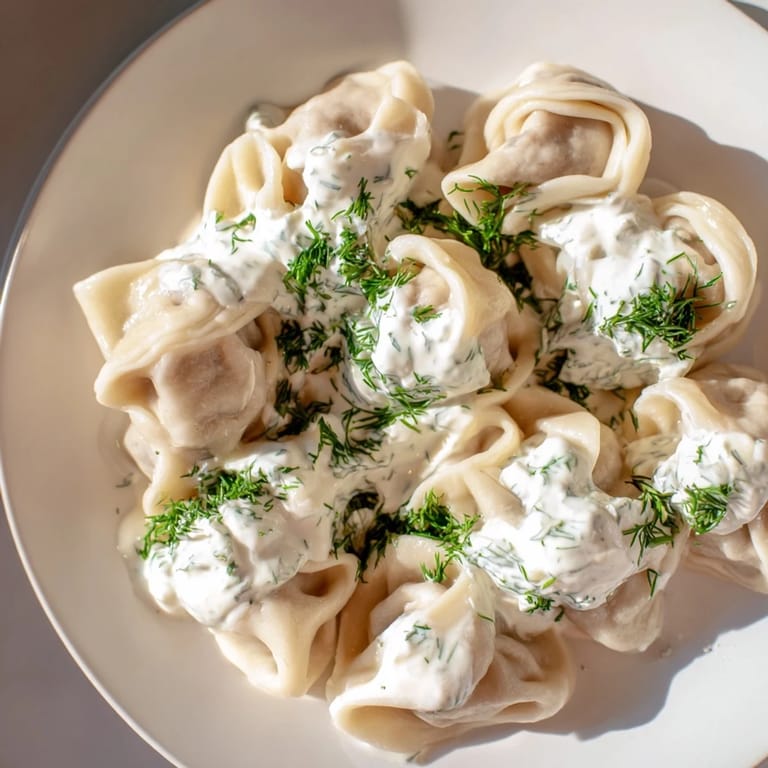
- Use a slotted spoon to transfer the pelmeni to bowls, then top generously with sour cream and a sprinkle of fresh dill. Serve immediately while they're still steaming hot.
 Pin
Pin There was a moment when my daughter asked why I was spending so much time on 'just dumplings,' and I realized I couldn't explain it in words—only in the taste. These pelmeni represent something about slowing down and honoring the people we cook for, one small fold at a time.
Why Homemade Matters
Store-bought pelmeni are convenient, but homemade ones have a tenderness that comes from the care you invest in them. The dough is softer, the filling tastes brighter, and there's no waxy texture lingering on your palate. Once you've tasted the difference, you'll understand why this recipe is worth the effort.
Freezing and Make-Ahead Strategy
One of the best things about pelmeni is that they freeze beautifully before cooking. Spread them on a baking sheet in a single layer, freeze for a few hours, then transfer to a freezer bag where they'll keep for up to three months. When you want them, drop them straight from the freezer into boiling water—no thawing needed, though they'll take about 8 minutes instead of 5 to 7.
Serving Variations and Traditions
Sour cream is the classic pairing, but pelmeni are adaptable to what you have on hand or what you're craving. Some people swear by vinegar, others prefer melted butter with a touch of crispy onions, and still others love a simple broth on the side. The beauty is that these dumplings are delicious enough to shine no matter what you choose to serve with them, though I always keep my sour cream close by.
- Try mixing equal parts sour cream and fresh chives for a brighter topping.
- Save your dumpling cooking water as a light broth to drizzle over the pelmeni for extra tenderness.
- A pinch of nutmeg in the filling, as suggested in the original notes, is subtle but unforgettable once you taste it.
 Pin
Pin Pelmeni are more than dinner—they're a way of saying 'I have time for you' without speaking a word. Every time you fold one, you're continuing a tradition that's warmed families through long winters for generations.
Recipe Q&A
- → What dough thickness is ideal for pelmeni?
Roll the dough to about 1/16 inch (2 mm) thick to ensure a delicate yet sturdy wrapper that cooks evenly.
- → Can pelmeni be prepared in advance?
Yes, pelmeni can be frozen before cooking; place them on a tray to freeze individually, then store in a bag for up to three months.
- → What meats are traditionally used for pelmeni filling?
A classic mix usually combines ground pork and beef, seasoned with onion, garlic, salt, and pepper for balanced flavor.
- → How to prevent pelmeni from sticking during cooking?
Bring salted water to a rolling boil and stir gently after adding pelmeni. This prevents them from sticking to the pot or each other.
- → What sauces complement pelmeni best?
Sour cream sauce mixed with fresh dill is traditional, but melted butter or a splash of vinegar also enhance the flavors beautifully.
- → Are there any tips to seal pelmeni effectively?
Pinch the edges tightly and bring corners together to form the classic pelmeni shape, preventing the filling from leaking during cooking.